Thursday, March 14, 2013

Vegetarian Won Ton Soup & Mushroom Tofu Dumplings

A few weeks back I had the unique pleasure of leading a cooking class for children.  It's one of my favorite things to do.  I appreciate any chance to affect young people's perspective on eating, and they are such honest students.  They always approach a class with a healthy dose of suspicion. "Will this really be worth my time and attention?"  I so love when that question gets answered in the affirmative and they "click" in and decide to get involved.

So I wisely started with the class by making Brownies.  Yes chocolate and sugar does tend to trend positive among the 10 year old set. The rest of the menu was:

Won Ton Soup
Oven "Fried" Chicken Fingers with Buttermilk Chive Sauce
Classic Macaroni and Cheese
Roasted Broccoli 

Pretty kid friendly I thought, with lots of easy and fun kitchen skills to learn. And then I received an email from the hostess of the party... "One of the children is a vegetarian, can we make sure the soup is vegetarian?"

Well so much for my lingering doubts that children wouldn't eat the broccoli!  I was naively surprised at this news and I felt every pound the meat and potatoes midwestern boy that I was raised to be.  But why wouldn't I expect a vegetarian kid among the mix.  I happily include vegetarian options at all my catered events, many of my friends are vegetarian and I'm always striving to make several of our own weekly meals vegetable based.  Did I somehow imagine vegetarian parents cooking up rib steaks and lamb chops for their kinder folks? Sometimes Big Mary amazes himself with obtuseness...

And so, the results of my re-thinking are presented here.  As is usually the case, when required to think outside the box, something newly delicious has presented itself.  The challenge was to make vegetarian won ton soup that would please the meat eaters as much as the vegetarians.  For the stock I turned to lots of roasted root vegetables, heightened by mushrooms for that satisfying umami base note and accented by spices used in Vietnamese Pho Soup (cinnamon, star anise, ginger and coriander).  The dumplings also relied on mushrooms for a meaty texture, augmented by mashed tofu for consistency.

I am happy to report that the result received thumbs up, both diminutive and full grown, across the board.  While the recipe for the broth takes some time, it's mostly non active time while the broth simmers.  Feel free to make it a few days ahead, or weeks ahead and freeze it.  The filling is pretty easily made by adults, and making won tons, of any style or flavor, is a great hands on, kid friendly activity.


Vegetable Won Tons
Makes Approximately 24 Won Tons

Ingredients:

Vegetable Oil              1 Tablespoon
Cabbage                    ½ cup, finely chopped
Shiitake Mushrooms   1 ½ cups, finely diced (approx 12 large shiitake 
                                  caps)
Carrot                          1 small, shredded
Fresh Ginger               1 teaspoon finely grated
Water Chestnuts         1 Tablespoon, finely chopped
Med or Firm Tofu        ½ cup finely diced
Sesame Oil                 1 ½ teaspoon
Garlic                          1 medium clove, minced
Soy Sauce                  1 Tablespoon
Hoisin Sauce               2 teaspoons
Scallions                      ¼ cup white and some green, sliced
Cilantro leaves            2 Tablespoons, chopped
Salt                              1/8 teaspoon

Wonton Wrappers
 1 Egg                          Beaten with 2 Tablespoons of water

Heat oil in a medium skillet.  Add cabbage, shiitake mushrooms, carrot and ginger.  Sauté over high heat  3 – 4 minutes until vegetables are cooked.  Add remaining ingredients (except won ton wrappers) and transfer mix to the work bowl of a food processor, fitted with the knife blade.  Pulse several times until mixture is broken down to a very fine chop.

Lay out several wonton wrappers on a cutting board with the point facing up (like a diamond shape) Paint the top two edges of the wonton very lightly with the egg wash.  Place a rounded teaspoon of the filling in the center of the wrapper.  Fold the bottom corner up to meet the top corner of the wrapper.  Press down the edges to seal and force out any air in the wont ton.  Paint one of the bottom corners of the triangle with some egg wash and press it into the opposite corner, forming the wonton.

Boil gently in salted water for 3 minutes.  Serve in the roasted vegetable broth.  Garnish with fresh cilantro or scallion slivers.

Roasted Vegetable Broth
Makes about 1 ½  QT

Ingredients:

2                                  Tablespoons Vegetable Oil
Carrots                        4 medium, well washed and chopped into inch 
                                   pieces
Celery                         3 stalks, well washed and chopped into inch 
                                   pieces
Onion                          1 extra large, cut into chunks (unpeeled)
Parsnip                        1 large, well washed and chopped into inch 
                                   pieces
Button Mushrooms     10oz , brushed clean and cut in halves or quarters
Cinnamon Stick          2
Star, Anise                  2 stars
Fresh Ginger               5 slices about the size of a quarter
Coriander Seeds         2 teaspoons, crushed under a heavy pan
Garlic                          5 small cloves – smashed with the side of a knife
Soy Sauce                  1 Tablespoon
Parsley                        A small handful, stems are fine
Fresh Thyme              3 large sprigs
2 1/2 quart water

Preheat oven to 450 degrees.  In separate bowls, toss carrots, celery, onions, parsnips and mushrooms  with some of the oil.  Scatter these vegetables on several aluminum foil lined baking sheets.  DO NOT CROWD THE VEGETABLES, LEAVE PLENTY OF ROOM.  This will allow them to brown some and not steam.   Roast for 8 – 10 minutes, letting them get some color. 
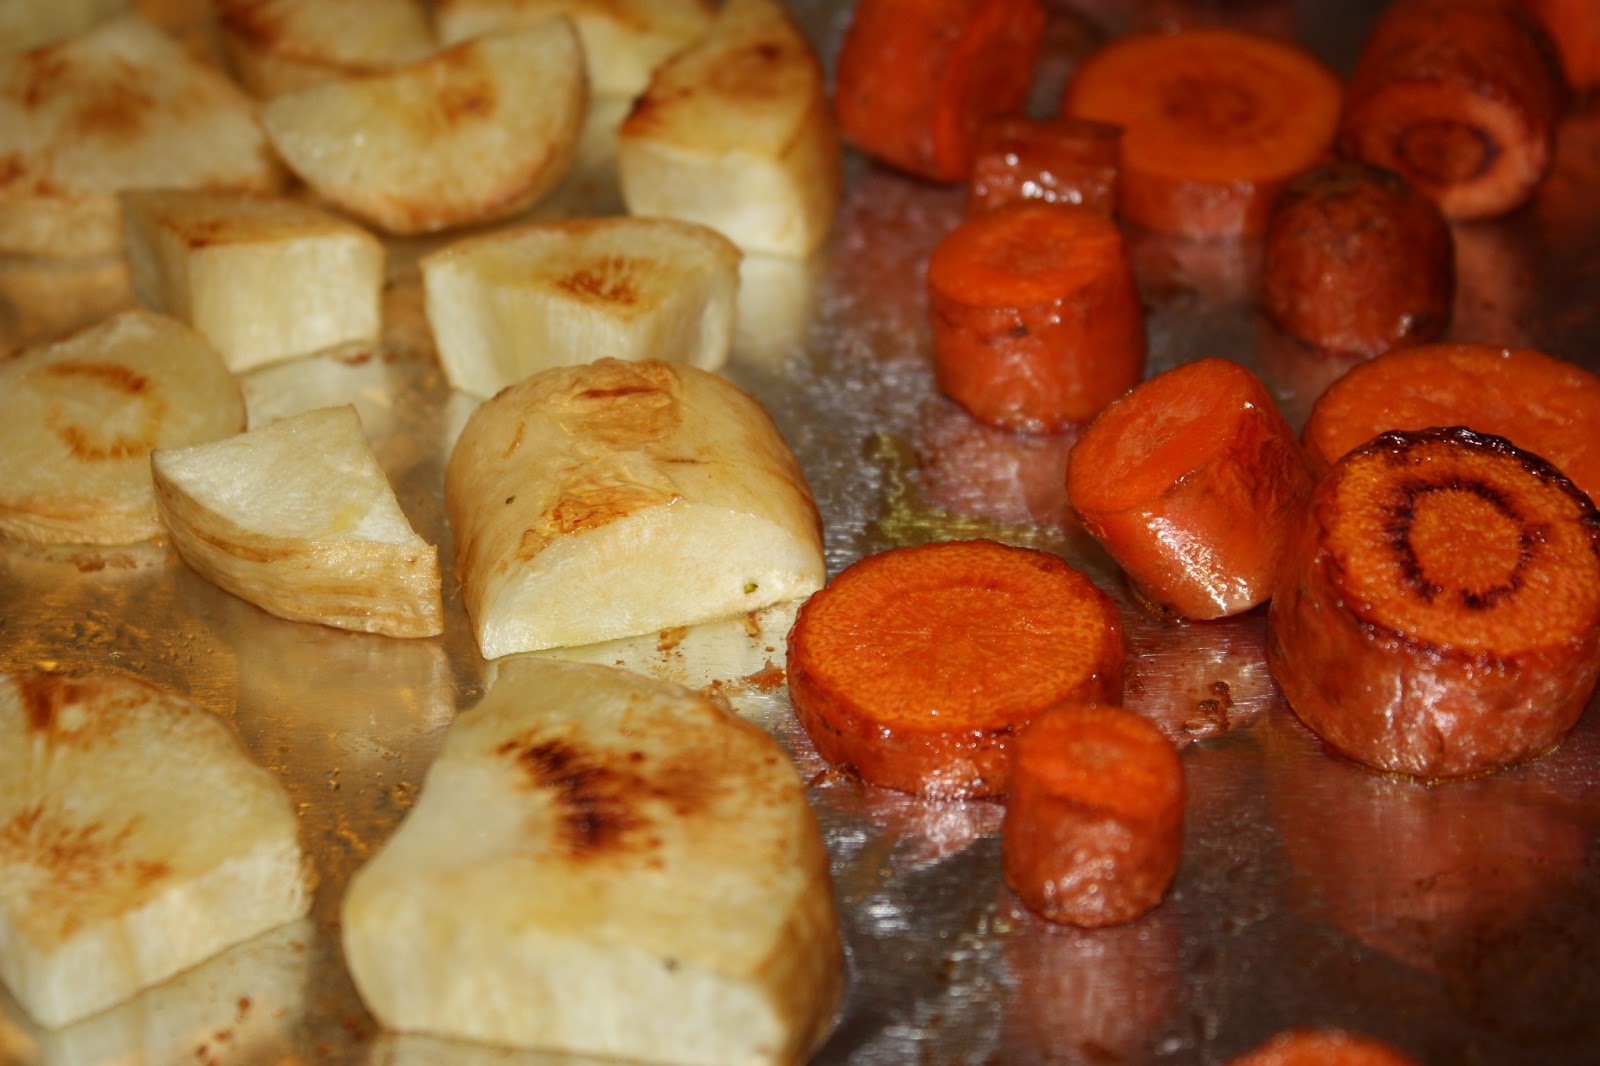
 
While the vegetables are roasting, place the whole spices in the stock pot.  Warm them over medium heat until they begin to release aroma.  Turn off heat and add water, herbs and soy sauce.  As vegetables are roasted, add them to the stock pot as well.  When everything is in the stock pot, bring to a boil over medium high heat.  Once the water comes to a boil, lower heat to maintain the stock at a gentle simmer for 75 minutes.  Let cool and strain well. 
Press gently on the solids in the strainer to release excess stock.  Measure stock, you should have about 6 cups.  If you have more or if the flavor is weak, return stock to the pot and reduce until the flavor is as strong as you want.  Adjust seasoning with salt & pepper as desired.

Copyright Big Mary’s Kitchen 2013

Friday, March 01, 2013

CONJURING SPRING - 
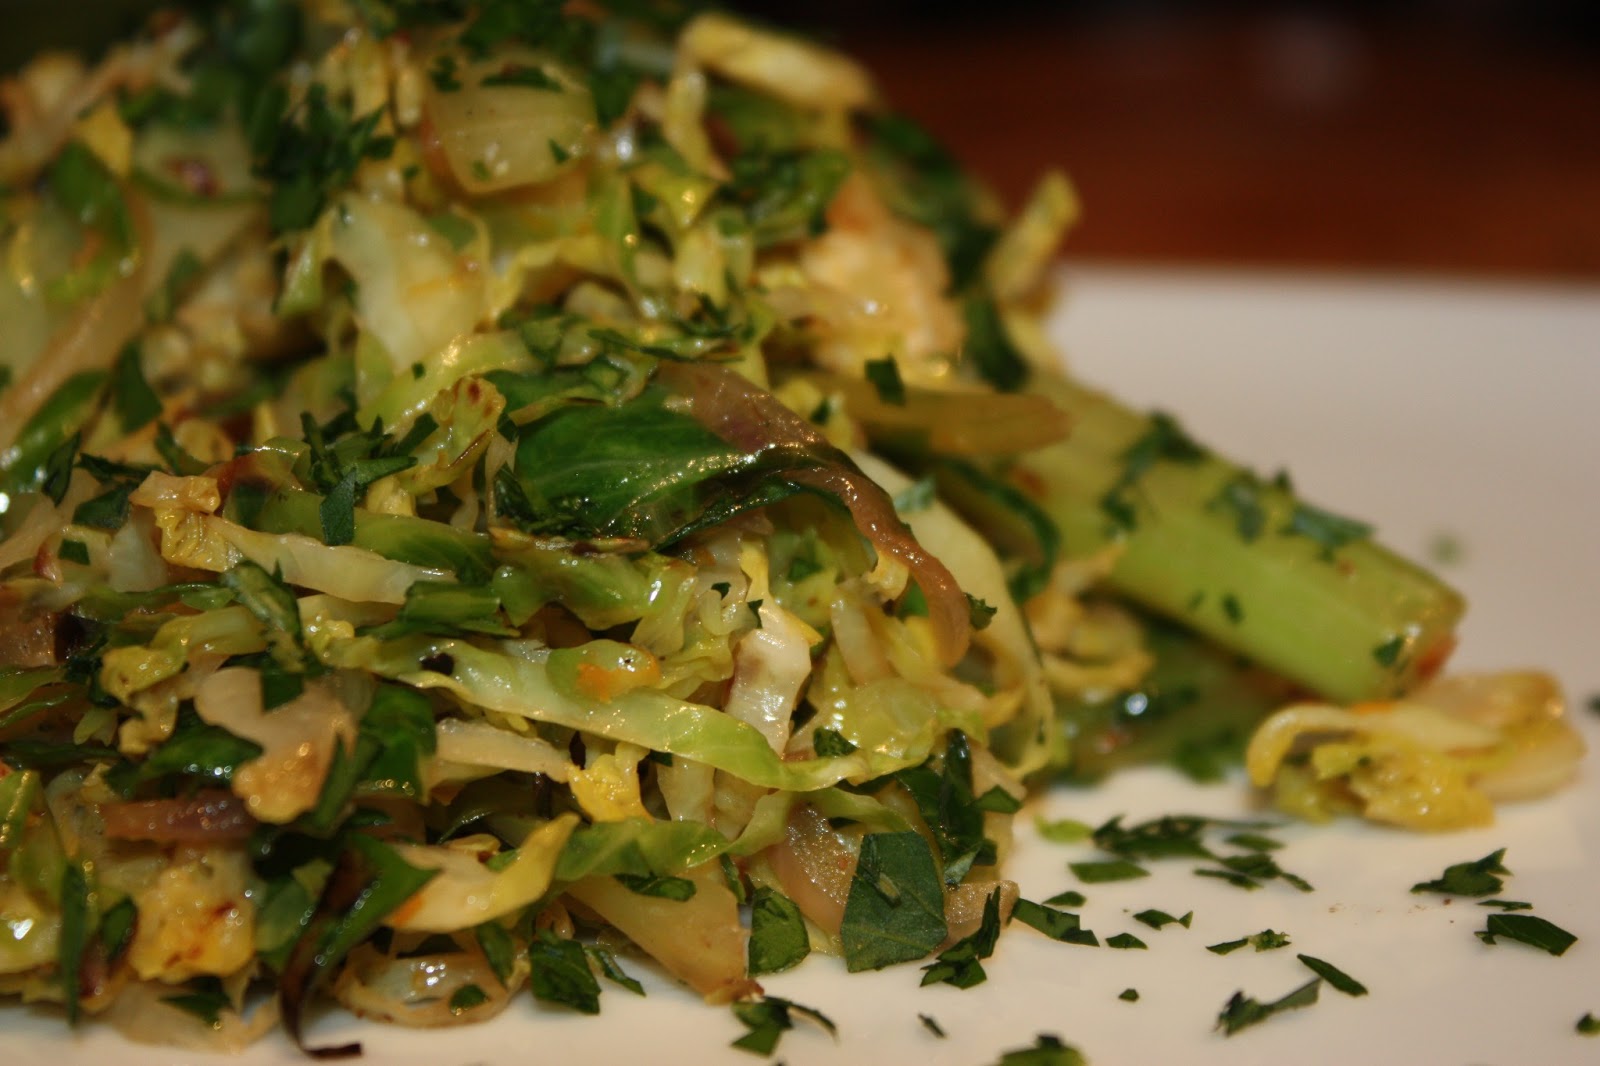
SHREDDED BRUSSELS SPROUTS with CELERY and MEYER LEMON

No, I don't have access to some magical calendar that has moved the Vernal Equinox to March 1st.  But I would love to have the customer service number for whomever is responsible for setting March 20 as the beginning of Spring.

Sorry... I know it's all about planets and the sun and history and druids and perhaps even the Mayans as well, but there's just no way I can respond to any day in March as winter.  I am fully aware that by putting this on paper (or cyber, or whatever...) I am sending up fireworks of red flares to all the gods daring them to smack down my audaciousness with 8 inches of snow or so.  If it happens, I'll cope... but with a SPRING blizzard, and no other term will apply.

So this may clue you in as to why I was prowling the kitchen today in search of something deliciously green and bright to bring some sunshine into the grey day I was seeing outside my window.  Yet, I am fully on board with seasonal eating, at least when it comes to my home.  Witness the bounty of kale, winter squash, cauliflower, parsnips and carrots my patchwork family has smiled through since October.  And so I honorably approached the refrigerator in search of a new perspective with some all too familiar inspiration.

O happy morning.... there in all their verdant glory were some brussels sprouts.  Don't let me see that look!  It's not Big Mary's fault if your Mama always cooked them to the consistency of grey green pudding.  Stay strong and hang with me here reader...  And some celery I spy, certainly green and bright, a bit of a dowdy step sister, but always under appreciated... and oh YES, that Meyer Lemon I couldn't resist buying.

If you are not familiar with Meyer Lemons, they are the dazzling citrus debutante that every chef wants to dance with.  A cross between a mandarine orange and a lemon, it is infinitely more interesting than either of it's parents.  Don't we all secretly aspire to the same claim?  With a maternal sweetness overlaying the tartness from papa lemon it also has a floral perfume uniquely it's own.  Happily they are becoming more and more available in regular markets.

And so I offer a recipe to tide you over until Spring closes the gap between nature and instinct.  Something to relish until Mama Earth send us ramps and asparagus, morels and rhubarb, and assures us of the bounty that will return to us again.  In the words of Thorton Wilder.... "Oh Earth, you're too wonderful for anybody to realize you!"

Shredded Brussels Sprouts with Celery and Meyer Lemon
Serves 4

2     Tablespoons  Herbed Olive Oil (or Extra Virgin Olive Oil)
3     large       Shallots, peeled and sliced thinly
1     large       Celery Rib, peeled
12   ounces    Fresh Brussels Sprouts
1                   Meyer Lemon ( or regular Lemon)
Salt & Pepper
2     Tablespoons  Fresh Parsley Leaves, finely chopped

Holding the stem end of the brussels sprouts, slice thinly on a kitchen mandoline, V-Slicer or Benriner slicer.  (Alternately you could thinly shave them with a sharp knife).  Cut the celery into thin julienne strips about 2 inches long.  Zest the Meyer Lemon and reserve.  Juice the lemon and reserve. (If using regular lemon, use only juice from half a lemon.)
Heat the oil in a large saute pan. Add the sliced shallots and saute over high heat for 1 minute.  Add the Celery and cook an additional minute.  Add the shredded Brussels Sprouts, lemon zest and salt and pepper.  Saute until sprout leaves are beginning to wilt and slightly brown.  Add lemon juice, stir well and serve.

Copyright Big Mary's Kitchen 2013

Sunday, February 24, 2013


CABBAGE ROLLS AND KITCHEN THRIFT

I'm always torn between embarrassment or pride...Am I a cheap SOB or a resourceful thrifty individual? If I was going to dive into complete disclosure I think I would have to claim bi-partisanship. It totally depends on the space and time. If I'm feeling particularly flush, dropping serious coin on a dinner in a fine establishment can bring me joy, soul satisfaction and inspiration. The 90's had a lot of those moments.... Lately, ethnic “dives” in shady neighborhoods resonate more precisely to my pleasure points.

And while I personally would never pay more than $20 for a haircut, I could completely justify shaving my head and selling my hair to afford an original piece of art that I fell in love with. Can I really tell the  difference between a $100 Italian Barbera and a $12 Chilean Carmeniere? I'd like to believe I could. But can I justify the expense? I'm feeling a lot less self confidence on that... It's just me.

What I do know is how smugly self-satisfied I get when I make “something from nothing” in the kitchen. This is nothing new. Grandmothers and professional chefs have relied on this perspective for years. That’s why they buy whole chickens and whole fish instead of parts and filets.  They want the bonus of the bones, backs and giggly bits that go into making stock.  But in our contemporary home kitchens, most of us don't take the time, and convenience becomes our thru-line.

I've written in the past about the intelligence of saving scraps to make stocks, especially vegetable and chicken stocks. It's so much common sense and given the stupid high price of canned stocks, it's basic home economics. I've also sung out with my exuberance of making asparagus soup from the woody stems of asparagus destined for the trash bucket. Similarly broccoli and cauliflower trimmings and leftovers can be soupercized into a winter cup or bowl of comfort food.

Equally important to getting the most out of a food budget is holding onto leftovers.  Whether it’s an uneaten ear of corn or the remainder of a package of tofu, creative thinking on how to re-purpose the bits and scraps that can accumulate in your pantry can go a long way to stretching a budget.  Plus I hate, hate, HATE wasting anything. It’s a part of our American lifestyle that makes us look spoiled and ungrateful.

Today I am singing the praises of stuffed veggies as a way of cleaning out leftovers.  Following is what I came up with facing the flotsam and jetsam of my particular refrigerator.  FEEL FREE TO IMPROVISE!!!!! That’s kind of the point!    That said, I also sing the praises of this recipe as both a lightened up version of comfort food, as well as a way of squeaking tofu into a meal. 

Here I’m setting forward cabbage leaves. Most Central and Eastern European countries have their own version.  Gołąbki, Holubky, Golubsty, Töltött Káposzta, Holubsti are all names that may linger on the tables of your family trees.  My stuffed cabbage are a more modern twist on Grandma’s.  If the rolling of cabbage rolls seems too labor intensive for your schedule, roasted sweet peppers, eggplant or zucchini boats would be other quicker options.

STUFFED CABBAGE ROLLS – NOT YOUR GRANDMA’S
Makes 12 - 18
Ingredients:

1  Large Head of Cabbage

1 Tablespoon Olive Oil
1 Medium Onion – peeled and finely diced (about 1 cup)
1 Small Red Pepper  –  (seeds & stem removed) finely diced ( ½ cup)
1 Small Jalapeno  - (seeds and stem removed) finely minced
2 cups  Thinly Sliced Mushrooms – white, cremini, shiitake, or whatever
2 Medium Garlic Cloves – minced
½ teaspoon sea salt
Freshly ground pepper
1 medium/large carrot – peeled and shredded (about ½ cup)

20 ounces Ground Turkey
1 cup cooked rice  - brown or white
½ pound firm Tofu – shredded on large holes of a box grater
1 Tablespoon Worcestershire Sauce
¾ teaspoon sea salt
Freshly ground pepper

1 Tablespoon Unsalted Butter
5-6 scallions – thinly slice, white and some green (about ¾ cup)
1  14.5 ounce can Petite Diced Tomatoes
1 teaspoon sweet paprika
½  teaspoon sea salt
1 ½ cups water
1 cup Sauerkraut (drained and rinsed) – OPTIONAL
1 small apple – peeled and grated (avoiding seeds and core) - OPTIONAL

DIRECTIONS:
Core the cabbage and set aside.
Heat a large sauté pan and add the oil. Add the onion, red pepper, jalapeño, mushrooms and garlic.  Sauté for several minutes until onion and peppers start to soften.  Add salt, pepper and carrot.  Cook one more minute, then remove from heat and allow to cool.
Put the cabbage in a very large pot.  Add enough water to cover well.  Remove the cabbage, salt the water and bring it to a boil.
While waiting for the water to boil…    Put ground turkey, rice, tofu, Worcestershire Sauce, salt and pepper in a large bowl.  Add cooled vegetables and mix well.  Set into the refrigerator.
In a large sauté pan, warm the butter until bubbling.  Add scallions and sauté for 1 minute.  Add tomatoes, paprika, salt and water.  Bring to a simmer and cook for 3 minutes.  Add the sauerkraut and / or apple if using.  Warm through. Remove from heat.
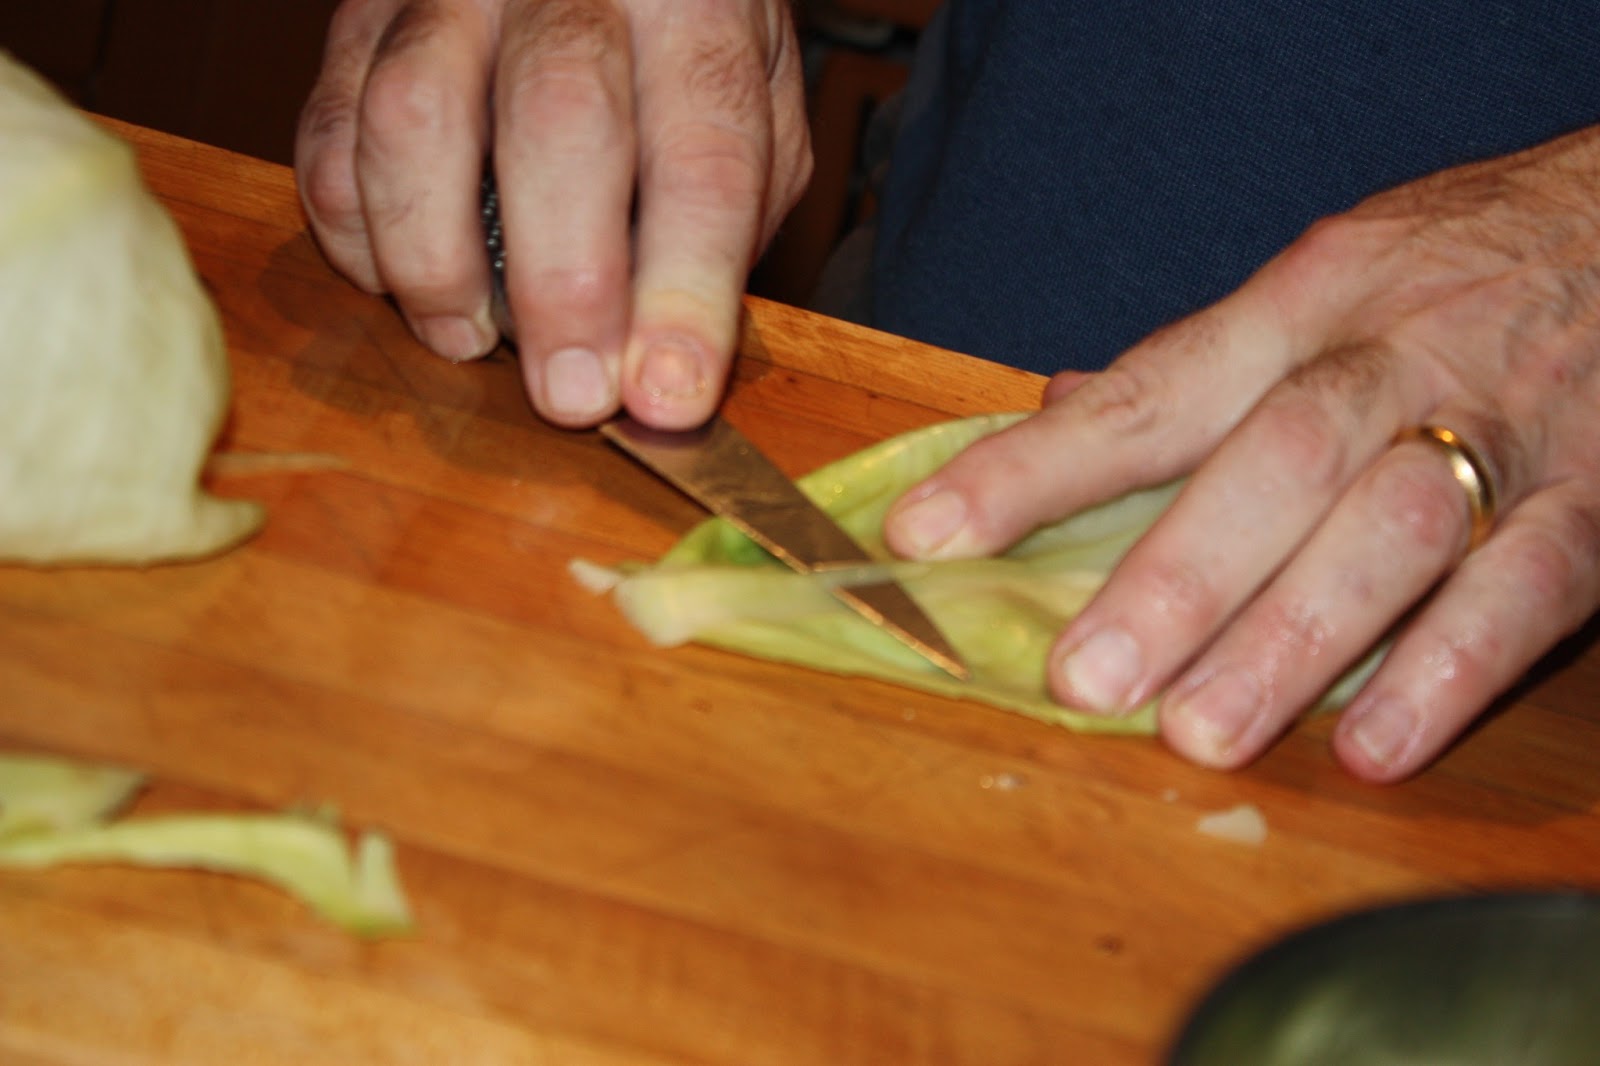
Carefully put cabbage in the boiling water.  As the outside leaves cook, pull them loose from the head and remove to a bowl of cold water.  Continue removing the leaves as they cook until you have 20.  They only need to be cooked enough to make them pliable for folding.  Trim the bottoms of the leaves and shave away some of the tough rib.
Remove filling from the refrigerator.  Put a cabbage leaf in front of you with the base at the bottom, the leaf curling up on the edges naturally.  Place about 1/3 cup of filling an inch or so above the base.  Roll the leaf forward, tucking the base in.  Fold the right and left sides of the leaf in and continue to roll forward, forming and enclosed package.  Set aside and continue until all the filling is used.
Line a large Dutch oven with some left over cabbage leaves.  Layer the cabbage rolls on top of the leaves, spooning some of the tomato sauce over each layer.  When all the cabbage rolls are in the Dutch oven, cover with remaining tomato liquid.  Cover with a tight fitting lid and place over medium high heat.  Bring to a boil and then lower heat to keep the rolls cooking at a low simmer.
Cook 60 – 75 minutes depending on the size of your cabbage rolls.


Friday, February 08, 2013


THAI GREEN CURRY CHICKEN

I’m curious what determines a person’s palate.  Certainly location.  Even in this world of cultural cross pollination, a child in Nagasaki or Adis Ababa is likely to come of age with a different frame of gustatory reference than I did in Springfield, Ohio.   Economics of course would come into play in a similar way.  Deep pockets could certainly lead the way to depth of cuisine and all the variety therein.

Family of origin…  and probably to a certain degree the culinary capabilities of whoever was in charge of feeding said family.   Or culinary proclivities…  Growing up under the influence of a militant organic vegetarian would have as significant of an influence as a home cook who depended on Hamburger Helper, canned spaghetti sauce and take out menus.  I also had the pleasure of growing up in a family with little tolerance for finicky eaters.  You ate what was on the table, or waited until the next meal.  That will broaden a child’s tastes.

Sophistication … or just the desire to seem sophisticated is another factor.  I know a few people who might never have ventured to try sushi or caviar had they not been offered it in public, and from the hand of a lovely one they hoped to impress. Personally I am still “jonesing” for those caviar-luscious parties of the 1990’s, and proud to be someone privileged to reminisce about that kind of indulgence!

But I’ve come to believe that the major determining factor is how much joy one derives from feeding themselves.  Big Mary has the potential to derive A LOT of joy! Too much my doctor might say.  I’ll concede I have much to learn about control, both portion and self….  But I would SO rather deal with the frustration of extra pounds than be one of those food phobic folks with a litany of foods they never eat.

In the years following my 1980 arrival in New York City, I have found a lot of culinary G spots, flavors and aromas that opened my unschooled Midwestern eyes wide.  Who had ever heard of Pad Thai before I found that Chinatown dive?  Pastel de Choclo?  I barely knew where Peru was, but I knew I loved this corn custard casserole I found in Hell’s Kitchen! And I continue to be drawn to these much less expensive,  endlessly inspiring centers of culinary pride for the enterprising immigrants who open their kitchen to NYer’s, always on the prowl for the next new thing.

Here is a recipe inspired by those flavors that’s so easy to make it should become a regular event in your kitchen.  That’s why I encourage you to go the extra distance to source out the unusual ingredients.  Something this delicious deserves a little effort!  And these Thai kitchen staples will keep refrigerated for a very long time.  (The lime leaves freeze well for more than a month.)  But once sourced, this is an exotic yet accessible dinner that can be thrown together in less than 30 minutes.  As one of my private cooking class clients said last week… “My friend is very a very picky eater, but she would love this…. I’m going to make this for her. I just won’t mention the ingredients.”

THAI GREEN CURRY CHICKEN - Serves 3 - 4

Ingredients:
1               Tablespoon Vegetable Oil
5               Small Shallots, peeled, halved and slivered - 
                 approx 1/2 cup
1 - 1 1/2     teaspoons Thai Green Curry Paste 
                 (depending on desired spiciness), 
                 available in Asian grocery stores
3               Large Kaffir Lime leaves - stems removed
                 and finely chopped, (3/4 teaspoon), 
                 available in Thai or Asian Grocery stores or
                 substitute 1/2 teaspoon grated lime zest
1 - 1 1/4     Pounds boneless Chicken Breast - cut into
                 1 inch pieces
1               Medium Red or Yellow Pepper, stemmed, 
                 seeded and cut into 1/2 inch slices
1 1/2          Tablespoons Thai Basil, chiffonade cut -
                 available in some Greenmarkets, many 
                 Thai/Asian groceries or substitute equal
                 parts mint and regular basil


Heat a large skillet or wok over high heat.  Add oil.  Add shallots and cook a minute or so until they begin to soften.  Add Curry Paste and stir continually for 30 seconds.  Add chicken, red pepper and chopped lime leaves.  Cook over high heat for 1 minute.  Add 1 1/2 cups of coconut milk, reserving the rest for final seasoning.  Lower heat to medium. Cook for several minutes until chicken is cooked through, about 4-6 minutes.
Add Lime juice and basil.  Stir well, taste and adjust seasonings as desired ...
Too spicy?  Add remaining coconut milk.  Needs salt?  Add another 1/2 teaspoon of fish sauce.  Needs acidity?  Add another 1/2 teaspoon of lime juice.

Serve with steamed jasmine rice.


Copyright 2013 Big Mary's Kitchen


Friday, February 01, 2013

Slow Cooker Apple Butter

I've recently developed a recipe for Apple Butter to both keep up with my handsome husband's bottomless appetite for homemade jams and preserves, and winter's lack of variety for canning jams and such.  I've also adapted the recipe to use Splenda artificial sweetener...  Another nod to that same husband's "bottomless" appetite for sweet jams.  I know there is plenty of arguments against artificial sweeteners.  YOU take it up with him!

I've added this recipe to a revised edition of one of my early blog posts about apples and making apple butter.  There's plenty to be said for the more organic and traditional process outlined in the original post.  There's a LOT to be said for letting your Crock Pot do the work overnight while you sleep!

And so, please enjoy the following.  When Big Mary was taking baby steps... October 2006


Apple Glory

I've bellyached before about the year round availability of way too many fruits and vegetables that years ago had specific seasons.  It holds true even for apples.  Let’s face it, Granny Smiths and Red Delicious apples have become as ubiquitous and expected as fake eyelashes on drag queens.  That's  why come  September till November or so I’m constantly of the prowl at our Greenmarket.  Every year I’m seduced by more and more varieties as local farmers feed our fascination with heirloom and specialty apples.

A local newspaper tallied up 34 varieties at a recent Greenmarket; including some very old and rare cultivars like the Newton Pippin (George Washington’s favorite),  the very pale fleshed apple known as Winter Banana, as well as the less rare but no less cherished  Macintosh, Jonathan, Macoun, Northern Spy, Cortland, and some newly crossbred varieties like my favorite the Honeycrisp.  Each one has a unique blend of distinct sweetness or tartness, crisp crunch or soft melting bite. Some are puckeringly acidic, some are pure honey sweetness, and some heirloom apples even carry the tannic dryness of a big red wine.   And of course that’s part of the glory of apples.  Some excel in pies, some are bound for sauce and others just deserve to be enjoyed out of hand.

It's easy for a North American to take these red, pink, yellow and green beauties for granted. Partially because the storage and foreign grown apples we endure January through August deserve to be taken for granted. Most are one dimensional and flavor challenged. However on the plus side, they are damn convenient. They keep for a week or more if the heat's not too high, they are versatile, they are easy to eat, and most apple recipes fall into the realm of "comfort food".  But like macaroni and cheese, meatloaf, mashed potatoes and other "comfort foods", a lot of the time these dishes aren’t very comforting.

We also undervalue apples because they are so omnipresent in our lives.  They're just everywhere from lunch boxes to deli counters to teacher’s desks.   My partner, “The Handsome Venezuelan” is always reminding me that this is not nearly so true in warmer regions, where apples and pears are considered quite exotic, much like we view guavas, mangoes, or passion fruit. And in the same spirit with which he dismisses the flavorless mangoes in our markets, I suspect there are damn few tropical tots who have ever tasted something as crisp and heady as a fresh picked Winesap apple.

When my dear Mama Gladys passed away in September, we drove back to Ohio to celebrate that lovely lady and wish her a sweet journey over. The nine hour return trip to NYC was sweet, not only due to reflections on my Mom's long and happy life, but also sweet with the crisp cidery smell of a bushel of apples from my middle sister's ignored apple tree. Before the horses and dogs grabbed the entire harvest, I threw a ladder up high and pulled down a few bags full. According to my eldest sister, they are Jonathan apples. I've learned not to question because she's usually right in such matters.
Yesterday, I spent a long aromatic day producing about 12 pints of old fashioned apple butter, so good my Mama almost came back for a taste. So good in fact, the Venezuelan proposed to me... Again.  Then ordered me to hide them from him and portion the jars out judiciously.  

Here's my typically brief outline of how you can share the love.  As well as a time saving more modern recipe…
Old Fashioned Apple Butter
Wash a big bunch of apples. A mix is a good option (perhaps McIntosh, Winesap, Macoun & Gala), though I succeeded with one variety that was tartly sweet. Roughly cut the unpeeled apples into eighths or quarters and put into a large heavy bottomed stock pot. Do not core or seed the apples. Add Apple Cider (or water, or a mix of both) until it just covers the apples. Place over medium high heat and simmer, uncovered, until the apples are completely collapsing. The timing will vary depending upon variety. A McIntosh will go quickly; a Granny Smith will take much longer. Cool the mixture and then pass it through a food mill.
Measure the puree and place in another heavy bottom stock pot (or the same one washed out)and add sugar at a rate of 50% of the puree. In other words, for 8 cups of puree, use 4 cups of sugar. I optioned for a little less sugar and was happy for it. Then stir in ground spices (I like a lot, so I used cinnamon, allspice, cloves, nutmeg and ginger), a few pinches of salt and a generous squeeze of fresh lemon. Bring to a simmer, stirring often, and then cook until it is thickened and condensed. This will take several hours, and you need to stir it often, about every 10 minutes at least, checking for sticking on the bottom of the pan. A good test for when the apple butter is done is this: chill a china plate in the freezer. Drop a tablespoon's full of the apple butter on the plate. Wait a minute or two. When liquid no longer seeps out from the mound of puree, you're there.
Proceed with standard water bath canning procedures which can be found in any canning book or online.

Here is a method I tried in the time since I made my first batch and I was pretty happy with this as well.  I’ll admit, it’s not quite as deep in flavor, but given the trade off of convenience, I still recommend it.

Slow Cooker Apple Butter

6          Pounds of Apples    A mix of 3-4 varieties, Peeled
1 1/2    Cups                       Granulated Sugar (or Splenda - See Note*)
1 1/2    teaspoons                Ground Cinnamon
1/2       teaspoon                  Ground Ginger
1/2       teaspoon                  Ground Nutmeg
1/4       teaspoon                  Ground Cloves
1          medium                    Fresh Lemon

Grate the apples, using the large holes of a box grater, directly into the slow cooker.  Add sugar and spices.  Add zest on the lemon, then squeeze lemon juice into the apples, discarding pits.  Stir everything gently and cover.  Cook on Low for 12 - 14 hours.  Remove lid and whisk thoroughly to smooth out the apple butter.  Cook an addition hour to hour and a half to dry out the mixture.  Stir occasionally.
Makes 6 - 7 half pints
This can also be canned with the traditional water bath canning process.  Please check any reliable canning website.  Ball Jars maintains a great one.

Let me just say, if you've never tried canning, it's just a big hoot and a holler.  Very safe in my experience  as long as you follow instructions carefully, and you've got the right acid and sugar content provided by jams, jellies, or the acid in tomato sauces and salsas.  And it just makes you smile with accomplishment.  Besides it impresses the hell outta people who don't know how easy it is!

*NOTE - I don't know the kitchen science of canning with artificial sweeteners well enough to guarantee the safety of caning this recipe using Splenda to replace the sugar.  It WILL keep in the refrigerator for several weeks and freezes very well.

Friday, March 30, 2012

Spaghetti with Caramelized Onions, Roasted Cauliflower, Parmesan and Pine Nuts

Well, in true Big Mary style I have fretted and 2nd guessed myself for more than a month over this recipe.  It's an old favorite of mine that I developed years ago trying to revitalize the vegetarian pasta offerings at an old kitchen best left unremembered.  Trouble is I was always making it for around 50 people or more at a time, and we just never got around to writing up a recipe for it.

And anytime I've made it at home, it was casually thrown together based on a mix of how much cauliflower I had and a generous supply of tried and true kitchen instinct.  When I got around to dragging out the scale and measuring spoons, back in ... oh Lord was  it February????  I came up with a version that was tasty, looked great, but was just a little too sweet from the caramelized onions.  

This was followed by a month of ponderous introspection, depleted motivation and significant self doubt.  About many things not just pasta.  Good sense returned though, as it typically does, and I decided to give myself the benefit of the doubt, strap on Big Mary's apron and post this pasta ASAP.  After all, it's not my job to decide whether I'm worth reading.  I just need to get the damn words on the page, er screen, er... whatever.  Note to reader, this is NOT a shameless plea for praise.  Though patronage in the Renaissance manner might lift anyone's mood!

Which brings us to March 30 and the sprouting of the earliest Spring on record.  So before it's impossible to tempt anyone with a Roasted Cauliflower recipe let me toss this really tasty dish your way.  And if indeed the thought of more roasted cauliflower is causing the edge of your lip to curl involuntarily....  I bet this would be damn tasty with Roasted Asparagus also.....

So for those curious few, what I did to address the sweetness issue was to reduce the length of time the onions are caramelized, and de-glaze with a more generous amount of dry Vermouth.  I also think it's important to use the best quality of Parmesan you can afford.  Preferably freshly grated Parmesan Reggiano.  The nutty flavor of good parm will help to balance the sweetness of the onions.  And finally, hit the finished dish with a few fresh grinds of Black Pepper.


SPAGHETTI WITH ROASTED CAULIFLOWER, CARAMELIZED ONIONS, PINE NUTS & PARMESAN

Chef's Note: For further discussion on caramelizing onions, please see Big Mary's blog post of Feb 6, 2012.

2      XL                     Yellow Onions,, sliced thin (about 2 lbs. total)
3      Tablespoons       Olive Oil
½      Cup                  Dry White Vermouth (or Dry White Wine)
½     large head          Cauliflower, cut into small florettes
2      Tablespoons       Olive Oil
½     Cup                   Pine Nuts, toasted in oven
12     Ounces              Spaghetti
½     Cup (or to taste) Parmesan Reggiano, freshly grated
                                Salt & Freshly Ground Pepper
                                Freshly chopped parsley (optional)

Warm the olive oil in a extra large sauté pan.  Add onions and mix thoroughly.  Sauté onions over low heat, stirring often until caramelized to a golden tan.  About 15 – 18 minutes usually. Watch carefully during final 5 - 8 minutes of caramelizing.  Raise heat to medium high and de-glaze pan with vermouth or white wine.  Cook for a minute and the remove from heat and set aside.


Preheat oven to 350*.   Lay pine nuts on a baking sheet and toast in oven for 3 – 5 minutes.  They should be golden and aromatic.  Remove from oven and cool.
Raise oven temperature to 450*.  Toss cauliflower with 2 Tablespoons of olive oil, S & P, and lay out on a baking sheet.  Don’t crowd the florettes, see picture. When oven is preheated, roast until lightly browned and cooked.  Remove from oven and set aside.

Cook spaghetti until al dente.  As spaghetti is cooking, return onions in their pan to low heat.  Add cauliflower.  When spaghetti is 1 minute from being ready, drain (reserving some cooking water) and add to onion cauliflower mix.  Raise heat, add about 1/3 cup of the cooking water and mix pasta together. Adjust seasonings, add toasted pine nuts and Parmesan, and toss again.

Serve garnished with parmesan cheese, freshly ground black pepper and parsley.


© Big Mary’s Kitchen 2011

Monday, February 06, 2012

Caramelized Onion & Ricotta, Black Peppercorn Dip


I've always preached the gospel that ingredient is King.  And I do believe that purveying the best you can find; be it a perfectly ripe pear, San Marzano canned tomatoes, fresh herbs from your windowsill or a well marbled steak, is the best investment toward successful cooking you can make.  But here's an instance when a well done technique can make kitchen alchemy.

I love it best when something amazingly simple can have such a profound effect.  And there's absolutely nothing complicated or difficult about caramelizing onions.  Nothing difficult that is unless patience is not among your virtues.  Because caramelizing onions could be the poster child for the slow food movement.  The upside to the low and slow style of caramelizing onions is that they require an equally low level of attention as they are doing their thing.  So the cook can go on with other business as they are doing their thing on a back burner.  And the rewards for your patience are as deep and wide as the possible uses for this "kitchen gold".

There are plenty of foodies out there espousing the various gustatory benefits of any number of flavor enhancers.  We've all correctly learned that "salt is a flavor magnet", and that a squeeze of fresh citrus can "wake up" everything from vinaigrettes to grilled pork.  But some ingredient enthusiasm can be overwhelming. Last year's "Bacon Makes It Better" overkill was responsible for re-imagining everything from peanut brittle to tofu into cholesterol bombs.  And of course there's one celebrity kitchen diva currently battling back from her butter-centric behavior. For the record ... that bacon brittle is addictively delicious and my fridge is never butter free either Ms. Dean.... BUT I can offer caramelized onions as a remarkable flavor booster that remains pretty much cringe free.


And to prove my case I plan on bringing you several posts featuring some of Big Mary's favorite uses for Caramelized Onions.  Today's being a spectacularly delicious and simple spread or dip for crostini or pita toasts.  Fresh Ricotta with Caramelized Onions and Black Pepper.  But 1st a quick "How To" for making Caramelized Onions.

Caramelized Onions
1 1/4 pounds Yellow, White or Sweet Onions (approximately 4 cups when sliced)
2 Tablespoons Olive or Vegetable Oil
1 pinch of salt
1 glass of Chardonnay (optional) 
2 Tablespoons Water

Clean and peel onions.  Slice onions in half from top to root end.  Slice thinly. (I prefer to slice them into half rings.)
Heat a large skillet, at least 10 - 12 inches diameter, over medium high heat. When heated add oil - (Measure It!.  You'll always overestimate what a Tablespoon is...) Then add sliced onions and mix well in the skillet.  Keep sauteing the onions and stirring them for a few minutes.  Add salt. When onions have collapsed and begun to turn translucent, lower heat to medium-low and pour yourself the glass of the Chardonnay if using.  Now relax!  Enjoy the wine and come back to give the onions a stir from time to time, every 3 or 4 minutes. 
I can't say for sure how long it will take as it depends on water content of your onions, how high your flame is and how efficient of a pan you are using.  But let's say a minimum of 20 minutes and perhaps as much as 30.
At first you'll notice the onions turning a little golden here and there,  then they will all take on a blond hue, then light brown, then tan and finally deep brown.  And with each step the volume will shrink and shrink.  One recipe I consulted advised to caramelize the onions until they are as brown as you think they should be, then give them 5 minutes more.  Probably good advice for the beginning onionista!  That said, for some recipes you won't need to take them as far as I'm telling you to here.
When the onions are deep brown, raise heat and stir in a tablespoon or two of water and scrape the bottom of the pan to deglaze the fond (brown sticky stuff on the bottom of the pan) which has great flavor and then turn off heat once water has evaporated. Remove from pan, cool and cherish.  You should have about 1/2 cup of finished product.  Again this will vary based on the onions you begin with.


And now, here's the first of my suggested uses for you caramelized onions...

Fresh Ricotta with Caramelized Onions and Cracked Black Pepper


2 Cups  Full Fat Ricotta (best quality you can find or make your own!)
1/2 cup Caramelized Onions, roughly chopped
1 very generous pinch of freshly grated nutmeg
3 Tablespoons Extra Virgin Olive Oil - the best you have
3/4 teaspoon salt
1/2 teaspoon roughly cracked fresh black pepper (or more to taste)
2 teaspoons parsley chopped
Country bread sliced and toasted with Olive Oil

Combine Ricotta, onions, nutmeg, EV Olive oil, salt and pepper.  Place in a bowl and garnish with parsley if desired.  Serve with crostini or pita toasts.

Copyright © 2012 Big Mary's Kitchen
Text by Edward Magel
Photos by Edward Magel & Yder Laya

Friday, December 02, 2011

Roasted Kabocha Squash Soup with Port and Apple ... and other sexy foods


As a chef I am often drawn into conversations about food. Most typically a request for tips, hints and fixes. But in our post Food Network world, cooking is a topic of conversation which nets a surprisingly diverse cast of gastronomically informed people. And so I've recently encountered a more sophisticated range of conversation. During the weeks before Thanksgiving I shared in an enthusiastic debate over what makes a superior stuffing. My emphatic opinion was that hand cut stale bread was crucial.

Occasionally during these conversations, I'm met with lapses of silence when I've waxed a little too poetic in my descriptions and directions. Actually, I don't think it's about being too poetic, but more accurately it's just me stepping out of the box and using my own language to describe flavor. Personally I don't see the problem, it all makes sense to me.

Maybe it goes back to my lack of formal culinary education, which I've always said has gifted me much more than it has ever held me back. I've discovered more by using an ingredient "inappropriately" to dynamic effect than any class in kitchen chemistry could have informed me with. And of course, NYC is "lousy" with culinary graduates, so I've never lacked for someone to tell me what temperature a creme anglaise is set at, or to show me how to de-vein a lobe of foie gras should I need the skill set.

And so, if we are having a kitchen throw down, or just sharing a meal worth discussing... you might hear me say that "It's good, but it needs a solid bottom note." Translation... It's tasty but it's all ethereal. It needs a flavor to help plant it's feet in the ground. It might be a judicious amount of a strong herb like bay, thyme or rosemary. Or maybe a dash of Worcestershire Sauce if it's a reduction or vinaigrette. Some molasses or switching out brown sugar for white...

A few weeks ago I was interviewing with a "young buck" of a chef who seemed full of desire to impress with his style that he's infused himself with in the 6 top quality restaurants he's worked in in the last 9 years.... When he asked me what kind of food I wanted to cook I said "honest food". And in answer to his quizzical look... "By that I mean, food that represents itself as what it is. A Brussels Sprout should taste like the best Brussels Sprout it can be. Heighten flavor don't change it. Ultimately it's NEVER going to get much better than homemade strawberry jam on a warm buttermilk biscuit with sweet butter. Whether we're cooking lobster, sweetbreads, heirloom tomatoes, white truffles or artisinal mac & cheese. If the flavor's not true and honest, you've missed the mark.

Which brings us to what I call sexy food. I remember developing dishes and hors d'oeuvres back in the day and sending back many an idea requesting my team to help me make it more sexy. This term, like pornography is mostly defined in the eye of the taster I suppose. But also, like the often referenced quote about pornography, I know sexy food when I taste it. Forest Honey with Gorganzola on a Whole Grain Crostini. Grilled Duck Breast with Pomegranate Walnut Chutney on Soft Polenta, Warm Oven Poached Oysters on the Half Shell with Truffle Butter Leeks, Properly Made Spaghetti Carbonara (especially when in Rome), or maybe just sweet butter with Maldon salt on a perfect slice of sourdough baguette. I think a lot of what makes a dish sexy is mouth feel. Something luxurious, typically rich and oh so smooth.

This is why any winter squash soup often fills the bill of a steaming hot dish of sexiness. At the same time, it's undeniable hominess can toss a grandmotherly blanket on it's sex appeal. And so I've found a way to throw some fishnets and high heels on this unctuous bowl. A little accessorizing never hurt any of us.

ROASTED KABOCHA SQUASH SOUP WITH PORT & APPLES
Serves 8

For the Soup:
3 - 4 pound Kabocha, Buttercup or Butternut squash
1 Tablespoon Olive Oil
¼ pound Sliced Bacon – cut into 1 inch pieces (optional)
1 Tablespoon Butter, (2 Tablespoons if eliminating Bacon)
1 ½ cups Onion (chopped)
2 medium Garlic Cloves, chopped (1 generous Tablespoon)
1 teaspoon Fresh Thyme Leaves- chopped
1 teaspoon Spanish Smoked Paprika - sweet
½ teaspoon Ground Cumin
¾ teaspoon Cinnamon
½ teaspoon Ground Ginger
¼ teaspoon Black Pepper – freshly ground
¼ teaspoon Nutmeg – freshly ground
¾ cup Port Wine
1 large apple (Honeycrisp, or other sweet-tart apple), peeled, cored and cut into 1” pieces
5 cups stock - (Chicken, Vegetable or a Combination
1 cup Half & Half

Yield – 2 ½ quarts

For the Garnish:
1 ½ cups Port Wine
1 large Apple – (again a Honeycrisp, Granny Smith or other apple that's not too sweet) cut into matchstick julienne
1 Tablespoon Parsley – chopped

Soup Directions:
Preheat oven to 350 degrees. Line a baking sheet with aluminum foil and spray with non stick cooking spray.

Cut the squash in half and remove seeds. Paint the cut flesh surface with olive oil and season with salt and pepper. Place squash cut side down on the aluminum foil and roast until tender when pierced with a knife. 30 – 40 minutes. Remove from oven and allow to cool. When cool, peel or cut away the hard rind, and reserve the cooked flesh of the squash.

In a large soup pot, warm the butter and add the bacon (if using). Sauté over medium heat until bacon begins to release fat. Add onions and garlic, and sauté until onions are translucent. Add thyme, cumin, cinnamon, ginger, black pepper and nutmeg. Stir and cook until spices are aromatic. Raise heat and add port wine. Simmer to release all the flavor from the bottom of the pan about 1 minute, then add apple, and stock. Lower heat, cover pot and simmer for about 15 minutes. Add reserved squash flesh and continue to simmer until apples are soft. Approximately 15 minutes depending on variety of apple used.
Remove from heat and allow to cool slightly.

Puree the soup in batches in a blender. For the smoothest result, puree the solids with just a little of the cooking liquid first, adding more liquid as you go. Transfer the puree to a sieve set over a larger bowl. Using the back of a ladle push the soup through the strainer, discarding the solids left in the strainer. Soup may be refrigerated and chilled at this point.

When ready to serve, warm the soup over medium heat. Stir in Half & Half, adjust seasonings (especially salt) and serve very warm. Garnish each bowl with the reduced Port and Apple Salad (See Below)

Garnish Directions:
In a skillet warm the port wine until simmering. Allow to reduce in volume to approximately ¼ cup, this may take 20 minutes or longer. The reduction should be syrupy. Watch closely to avoid burning. Set aside and reserve. I recommend making the reduction ahead of time.

For the apple salad, immediately before serving, julienne the apple and combine with the chopped parsley. After placing soup in the bowl, place a small portion in the center of the dish. Drizzle port reduction into the soup, around the salad and serve immediately.

All recipes, copy and photos Copyright Big Mary's Kitchen 2011